Filmmaker and founder of the Victoria Motion Picture School, Barry Casson, outlines 10 simple but effective techniques for lifting your film above the competition.
Make your video like real film. There is a simple but exciting way to make your video look more like film and take away the harsh look of video. It’s an old Hollywood technique that kept aging starlets always looking good. Using an elastic band to hold it in place simply put a thin mesh fabric such as a black or white nylon stocking over the camera lens and check out the results.
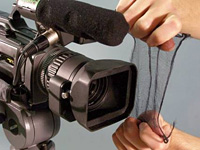
All the pros. use this technique. Plan every detail of your video from start to finish using “PPP”. This stands for Pre-Production Planning. It’s what every savvy producer does to guarantee a successful production and you can never do enough of it.
It’s called “Image Displacement” and it’s a great way to keep your editing really smooth and seamless. Just keep the eyes of your audience in the same part of the screen as you introduce new shots. Keeping the main action at the same place will make your editing easier and faster.
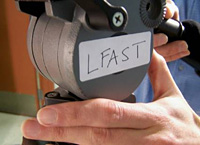
Use this tip each time you set up your camera. It doesn’t matter whether you are a professional or an amateur film or video maker. You need to remember this simple phrase, each time you set up the camera. “LFAST”. It stands for level the camera; focus the lens; set the aperture, set the shutter, and set the time code. Do this every time you set up and you and you’ll be ahead of the game.
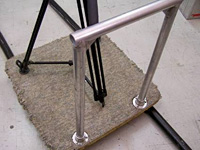
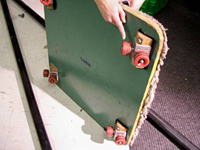
How to make your own camera dolly. You can make a simple camera dolly so your shots move smoothly through space just like the pros. All you need is two 10′ lengths of 3″ PVC pluming pipe, a 4′ by 4′ piece of 3/4″ plywood and four sets of roller skate wheels. The wheels are secured to the plywood at all four corners, one set for each corner. I have used this same system on more than a dozen professional videos with great results.
Get the filter look without filters. Go to the art supply store and purchase a half dozen pastel pieces of show card. Now instead of white balancing your camera on a piece of white card try balancing on these show cards and you will get a host of filter like color effects without having to purchase filters. Great for creating moonlight and old time looks to your videos.

Here’s a great rule for zoom shots. If you want to make your zoom shots count follow this rule. Without the camera rolling zoom in on the subject (a man seated) focus the camera on his eyes till they look sharp. Zoom back to your wide angle setting. Now start the camera and hold for 5 seconds. Zoom slowly into the close-up, when you get their hold for 5 seconds. Now if you decide you don’t like the zoom you can hold on the wide shot and cut to the close-up because you have left enough room on each end of the shot.
The clean frame technique. Never start a shot with the action of a person already in the frame. Have the person come into the frame from outside the frame and when the action is finished have them leave the frame. This is called the “clean frame technique” and will be terrifically helpful at the editing stages by providing more choices of where to cut.
Improve your vacations videos. Next time you are on vacation and you want to show your audience a specific area, don’t just wander around with the camera. Start with a nice wide pan shot showing the whole area. Now go in closer and give your audience more detailed information. Then go in for some nice close-up shots of even more detail. Just like the pro’s do it. In addition whenever possible grab shots of people reacting to what you are showing. Once again, just like the pros. do it. You’ve practically already done the editing.
Get great color for your video all day long. Always remember to re white balance your video camera every hour or so when shooting outside. The early morning sun is very warm in its color but as the day goes on more and more blue sky will make your shots look bluer. Let’s say you shoot a nice scenic from your hotel window at 8 a.m. and then you take another shot around noon. When you put these two shots together in editing your audience will become very aware of the color difference.


